The Best Hammer Curls Variations for Results You'll Notice

The hammer curl forces the harm to work harder than the typical dumbbell exercise, but both are far better than machines, forcing the body to use multiple muscle sets for a workout versus just an isolated few. So, while both weightlifting approaches work better than anything on a fitness gym track, the hammer curl can produce additional results because of how it works the arm thoroughly during a lift. Here are four different hammer curls variations that produce significant results, especially if done with a slow, deliberate lift approach.
The Seated Hammer Curl
Positioned on a workout bench, the user completely places his or her back flat on the bench support so there is no movement while lifting. As a result, the entire energy release is on the arms, particularly the bicep and forearm muscle group. The user can work out both arms simultaneously, and it’s usually suggested so there’s no off-balance slip that could result in a back twist or similar.
The approach works as follows. The user sits on the bench with the back support angled. It should be at about 60 degrees of an incline. The arms are weighted with the dumbbells, generally positioned almost straight downward, but watch out for jamming the elbow joints. The inner hand on each side should face inward to the body, and the face and chest should face directly forward.
Once lifting, it can be done in an alternating fashion or with both arms at once. The goal of the lift is to keep the hands straight facing inward without twisting. The top of the dumbbell weight should reach inline below the shoulder, compressing the bicep muscles. Then, at the same slow pace, the arms should be lowered. Repeat the process with the same number of reps each time.
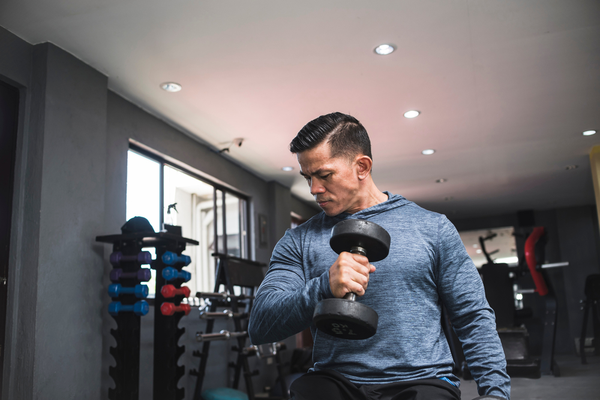
The Incline Preacher Curl
In this exercise, the user is standing versus sitting. Using one dumbbell, the user is positioned behind the bench incline with a higher angle of 75 degrees. Putting the arm out and forward and then down, the arm should be rested against the bench when fully extended. Done right, and the armpit is positioned right at the benchtop.
Start with the dumbbell up and lower it slowly until fully out and extended. Then, pull the dumbbell back up in the hammer position. Switch arms between reps to work both sides.
The Prone Hammer Curl
This exercise works gravity against your arms as you compress. Lay your chest flat on the bench, while your knees should be at the seat part. Your shoulders should be just off the bench. In this exercise, your weight is carried by your chest on the bench incline part laid flat. As your arms are extended, you grab the dumbbells on the floor.
Lifting slowly, your arms pull up and back until the bicep is compressed. Then, the movement is reversed as the dumbbell is lowered. However, you don’t let go or place the weight on the ground. It’s held the whole time.
Repeat for the number of reps needed, then at the last extension rest the weights on the ground. This approach will work both the biceps as well as the back muscles hard.
Standing Hammer Curls
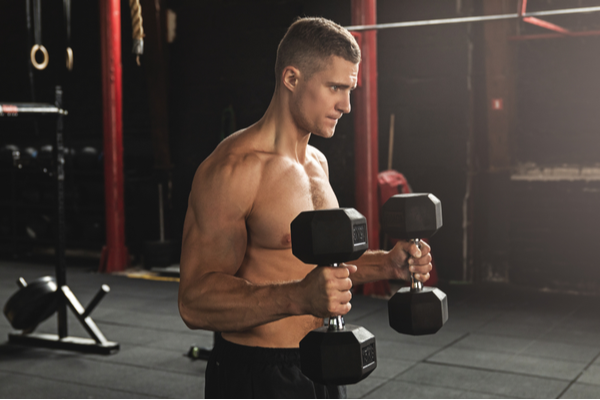
The simplest yet definitely one of the most effective of hammer curls, the standing variation generally has the user standing straight carrying two dumbbells, one in each hand. With the weights lowered down and the arms fully extended, the elbows are kept close to the body instead of flaring out to the sides. The body remains straight and positioned, and the user lifts one arm or both arms slowly upward to the shoulders. The hand palms stay in the same position facing inward.
The weights are then held for a second as the biceps are fully compressed and then lowered in the same path in reverse. Reps are repeated in sets. Users typically go through two rep sets and then really feel a burn by the third set.
The Over-Shoulder Hammer Curl
This approach works the back of the bicep extensively as it works to carry the weight upward. The resting form is actually with the bicep compressed. The user starts off either standing or on a bench sitting with the back on an incline. The arm with the dumbbell is straight upward with the palm facing inward to the body. The arm is then lowered at the elbow but not the upper arm and shoulder.
As the bicep compresses, the back of the upper arm will feel intense pressure to hold the weight dropping. The dumbbell is then moved back to a straight arm position up over the head. Users should be extremely careful with this variation to make sure the weight does not slip and drop on the person's head or shoulder. Starting with a lighter weight to build strength and correct form is highly advised.
How to Perform Hammer Curls: A Step-by-Step Guide to Sculpting Your Arms
Unlike regular curls, the neutral positioning of the wrist engages different muscles, providing a more comprehensive arm workout. By adding hammer curls to your routine, you can improve grip strength, enhance bicep peak development, and create a more symmetrical look to your arms.
Equipment Needed
To perform the hammer curl, you'll need a set of dumbbells. For added comfort, consider performing hammer curls while seated on a bench.
Step 1: Proper Grip
The first step in mastering the hammer curl is getting the right grip. Unlike traditional curls where the palms face upwards, the hammer grip involves holding the dumbbells so that your palms face each other. Ensure your grip is secure but not too tight, allowing for a natural wrist position throughout the movement.
Step 2: Starting Position
Stand straight with your feet shoulder-width apart and hold a pair of dumbbells at arm's length by your sides, with your palms facing your body. Keep your chest up, shoulders back, and elbows close to your torso to maintain the correct posture.
Step 3: Execution
Now it’s time to perform the hammer curl. Ensure that your upper arms are stationary, and only your forearms should move. Exhale as you lift the dumbbells by flexing at the elbow, maintaining a slow and controlled movement. Continue until your biceps are fully contracted and the dumbbells are at shoulder level.
Step 4: Return to Starting Position
After a brief pause at the top of the contraction, inhale and slowly begin to lower the dumbbells back to the starting position. This is one full repetition. Remember to keep your movements slow and controlled to prevent injury and to maximize the benefits.
Common Mistakes to Avoid
There are a few common errors that can detract from the effectiveness of the hammer curl. Swinging the weights rather than solely using your arm strength reduces the workload on your muscles. It's also crucial to avoid jerking motions, as these can cause strain. Ensure the move is deliberate and slow to truly target the intended muscles.
Variations and Progressions
Once you have mastered the basic form, you can progress by using heavier weights to continue challenging your muscles. Additionally, you can perform alternating hammer curls by curling one arm at a time. Seated hammer curls can also be beneficial for those who wish to focus more on isolating the bicep and forearm muscles.
Asked Questions
What muscles do hammer curls work?
Hammer curls primarily target the bicep brachii, specifically the outer or long head of the bicep, as well as the brachialis and forearm muscles.
Are hammer curls as good as bicep curls?
Hammer curls and bicep curls are both excellent for overall bicep development, but hammer curls are particularly effective at targeting the brachialis, a muscle that helps to push up the biceps.
How to do a hammer curl correctly?
To perform a hammer curl correctly, maintain a strong grip with dumbbells parallel to your body, perform controlled curls without swinging or jerking, and focus on squeezing your biceps at the top of the movement.
What is a good hammer curl weight?
Choose a weight that you can lift with proper form for 10-12 repetitions. The last few reps should be challenging but still achievable without significant strain or loss of form.
Conclusion
Incorporating the hammer curl into your arm workout can lead to substantial strength and size gains. Pay close attention to your form, start with a manageable weight, and give these instructions a try. With a bit of practice, you'll be on your way to achieving stronger, more defined arms in no time. Remember, always consult with a fitness professional if you're unsure about any part of your exercise routine, and listen to your body to prevent overexertion or injury. Now, go ahead and add some hammer curls to your next workout — your arms will thank you!
ActiveMan — Make Your Move
The Modern Guide to Men’s Health, Fitness & Lifestyle.

